Below you will find a step-by-step or should we say screen-by-screen instructions for setting up Microsoft Outlook 2010 on your Windows. It will work with othe OS platforms as well although some of the screenshots may not look exactly the same for the other operating systems.
1. Open up your Outlook and select the ‘File’ menu.
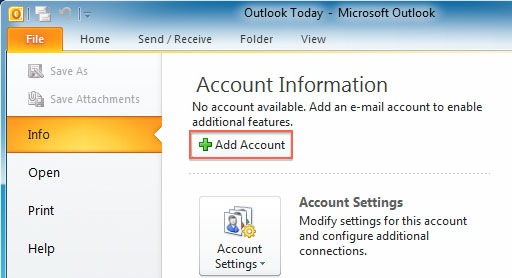
2. Select Info.
3. Click the “Add Account” button.

4. Select Manually configure server settings.
5. Click Next.
6. Choose “Internet E-Mail”.
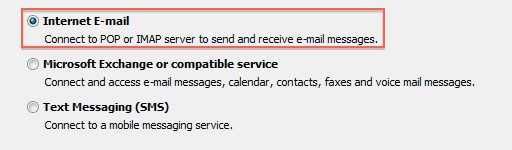
7. Hit Next
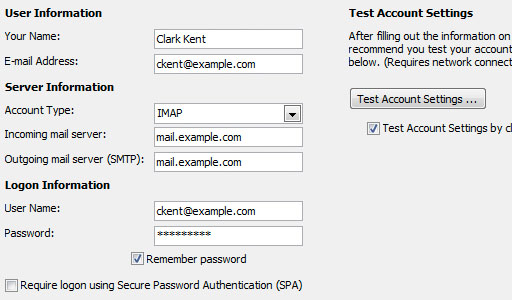
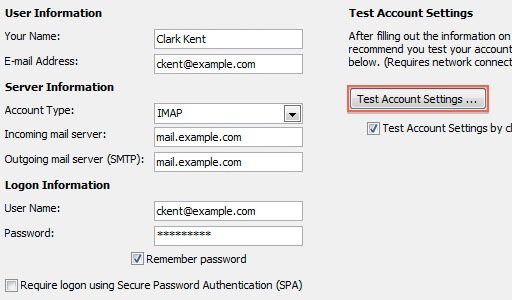
8. Please enter your name as you want it to appear on your outbound email messages.
9. E-mail address: Type your email address.
10. Account type is IMAP or POP3 (most people prefer IMAP as it leaves a copy of their e-mails on the server)
11. Incoming Mail Server: mail.supremecluster.com
12. Outgoing Mail Server: mail.supremecluster.com
13. User Name: Enter your email address for the User Name.
14. Password: Enter your email password.
15. Make sure the Secure Password Authentication is NOT ticked.
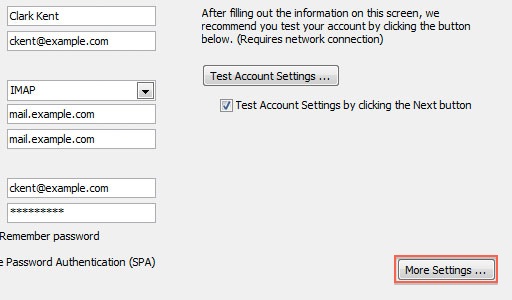
16. Once you fill all the information in hit the More Settings button on the bottom right.
17. Go to Outgoing Server tab:
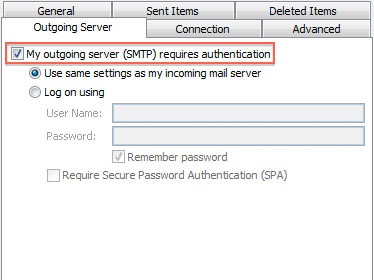
18. Tick the box next to “ My outgoing server (SMTP) requires authentication
19. Make sure you select “Use same settings as incoming mail server.
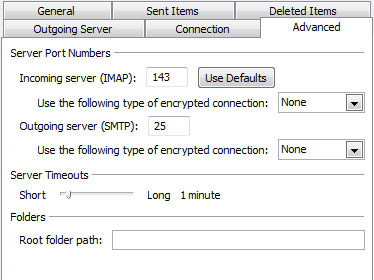
20. If you are using IMAP make sure the port is set to 143 and that the “Use the following type of encrypted connection” is set to NONE.
21. If you are using POP3 make sure the port is set to 110 and that the “Use the following type of encrypted connection” is set to NONE.
22. For outgoing server (SMTP): you can use ports 25 or 2525. Again please make sure that the “Use the following type of encrypted connection” is set to NONE.
23. Make sure you save all changes!
24 .Back in the initial screen make sure you test the settings in order to complete the setup.